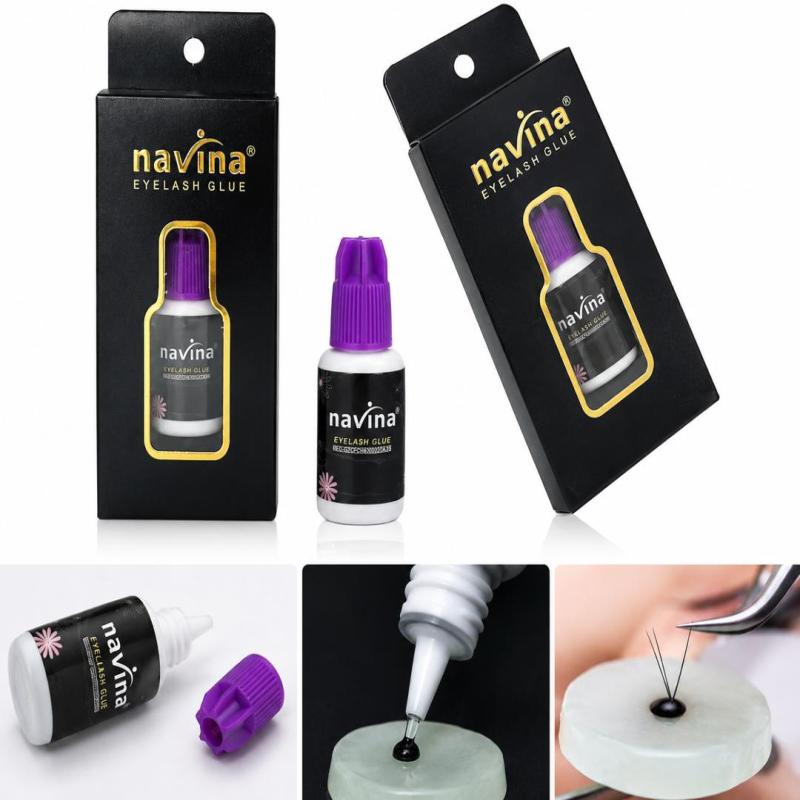
Professional eyelash-extension adhesive designed for securing individual lash extensions with a strong, reliable bond. Available product listings describe it as a fast-setting adhesive suitable for professional lash work, including classic and volume techniques. The pictured bottle is the black Navina adhesive with its distinctive purple cap and black-and-gold packaging.
What You May Not Like
* It is primarily a professional lash-extension adhesive, so it requires good application speed and technique.
* Fast-setting glue gives less room for correcting an incorrectly positioned extension.
* Fumes from lash adhesives can cause eye or skin irritation if used improperly.
* Performance can vary depending on humidity, temperature, storage and the technician’s technique.
Precautions
* For professional lash-extension use; avoid direct contact with the eyes and skin.
* Do not use on irritated, infected or damaged eye areas.
* Keep the client’s eyes completely closed during application.
* Work in a properly ventilated area.
* Do not deliberately test the adhesive directly on the eye or eyelid.
* Keep tightly closed when not in use and protect it from excessive heat, moisture and direct sunlight.
* Clean the nozzle before closing the bottle to prevent the cap from sticking.
* Check the manufacturer’s label for the exact shelf life and storage requirements of your particular batch.
How to use
1. Prepare the natural lashes: Cleanse the lashes thoroughly and remove oil, makeup and residue. Allow the lashes to dry completely before beginning.
2. Prepare your workspace: Have your tweezers, lash extensions, eye pads/tape and glue palette ready before opening the adhesive.
3. Shake the glue: Shake the bottle thoroughly before dispensing the adhesive so the contents are properly mixed.
4. Dispense a small drop: Place a small amount of adhesive onto a clean glue palette or suitable adhesive surface. Avoid dispensing an unnecessarily large amount.
5. Pick up the extension: Using clean isolation/extension tweezers, select the appropriate lash extension.
6. Dip the base: Carefully dip only the base of the extension into the adhesive. Avoid coating too much of the lash because excess glue can create clumping and an untidy finish.
7. Isolate the natural lash: Isolate one natural lash properly before attaching the extension.
8. Attach: Place the adhesive-coated base onto the isolated natural lash at the appropriate distance from the skin/eyelid. Do not allow the adhesive to touch the skin.
9. Allow it to set: Because this is a fast-setting professional adhesive, position the extension accurately and efficiently rather than repeatedly moving it after placement.
10. Continue the application: Repeat the process while maintaining clean isolation and using fresh adhesive as needed. One professional listing recommends replacing the glue drop regularly during application for optimal performance.
11. Finish and inspect: Check that extensions are properly separated, securely attached and not sticking to neighboring natural lashes.
12. Close and store: Wipe the bottle nozzle clean, close the cap firmly and store the adhesive according to the manufacturer’s instructions. Keeping the nozzle clean helps prevent the cap from becoming stuck.
Note: Exact drying time, retention and storage conditions can differ between Navina variants/batches, so I would not advertise a specific number of seconds or weeks unless it is confirmed on the exact bottle you are selling.